Mastering the Art of Using an All American Can Seamer
October 22, 2024An All American Can Seamer is an essential tool for anyone interested in home canning. It provides a secure, airtight seal that preserves the freshness and flavor of your canned goods, ensuring they remain safe for consumption over extended periods. Whether you’re a seasoned canner or just starting out, understanding how to use this tool properly is crucial.
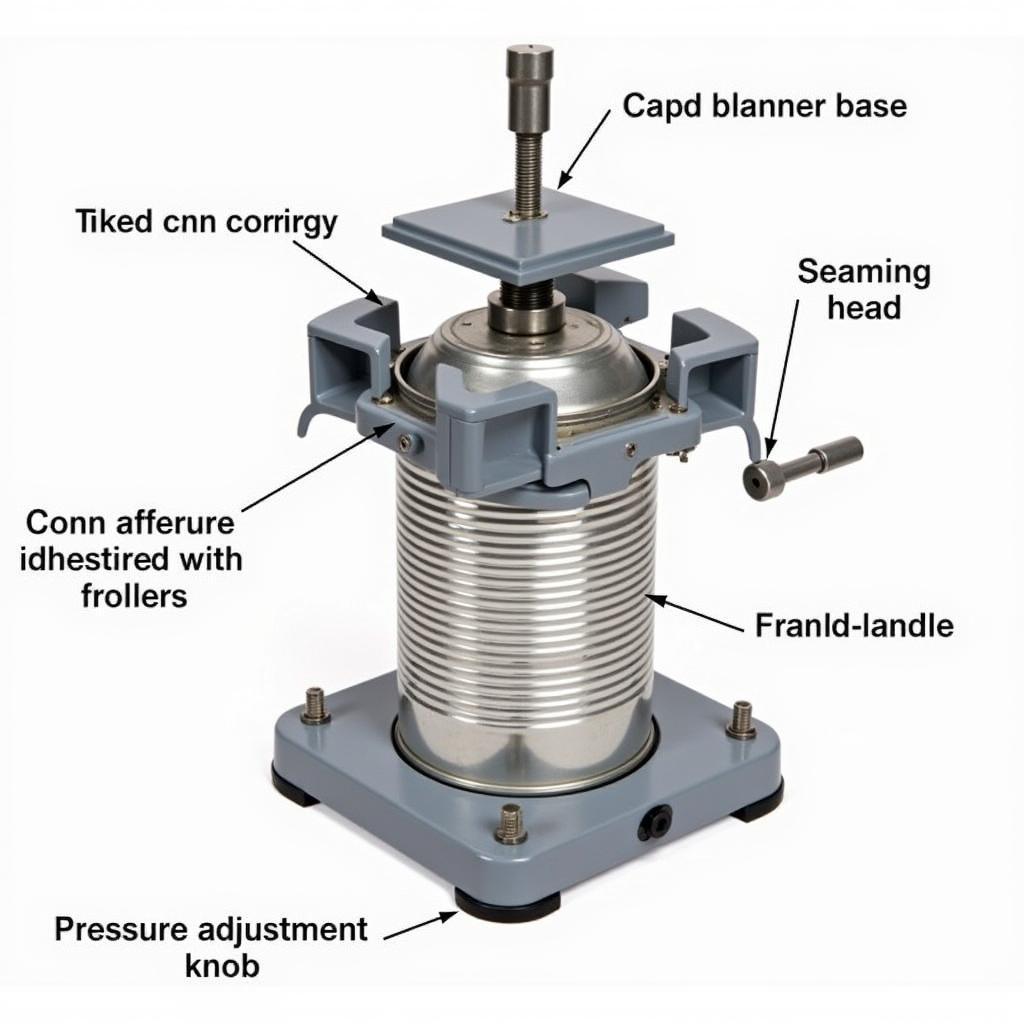 All American Can Seamer Parts
Choosing the Right Can Seamer
Before we delve into the operation of an all American can seamer, it’s important to select the right model for your needs. These can seamers come in various sizes, each suited to specific can dimensions. Using the incorrect size can lead to improper sealing and compromise the safety of your canned goods. Be sure to check the manufacturer’s guidelines to determine the appropriate seamer size for your chosen canning jars.
Step-by-Step Guide to Using an All American Can Seamer
Using an all American can seamer might seem intimidating at first, but it’s a straightforward process once you understand the steps.
-
Prepare Your Jars and Lids: Ensure your canning jars are clean and free from any cracks or chips. Likewise, check your lids for any damage, ensuring the sealing compound is clean and intact.
-
Fill Your Jars: Fill your jars with the food you wish to can, leaving the appropriate headspace as instructed in your recipe. This headspace is crucial for creating a vacuum seal as the food cools.
-
Remove Air Bubbles and Wipe the Rims: After filling, remove any air bubbles trapped within the jar by gently tapping the sides or using a non-metallic spatula. Wipe the rims of the jars with a clean, damp cloth to remove any food particles that could interfere with the seal.
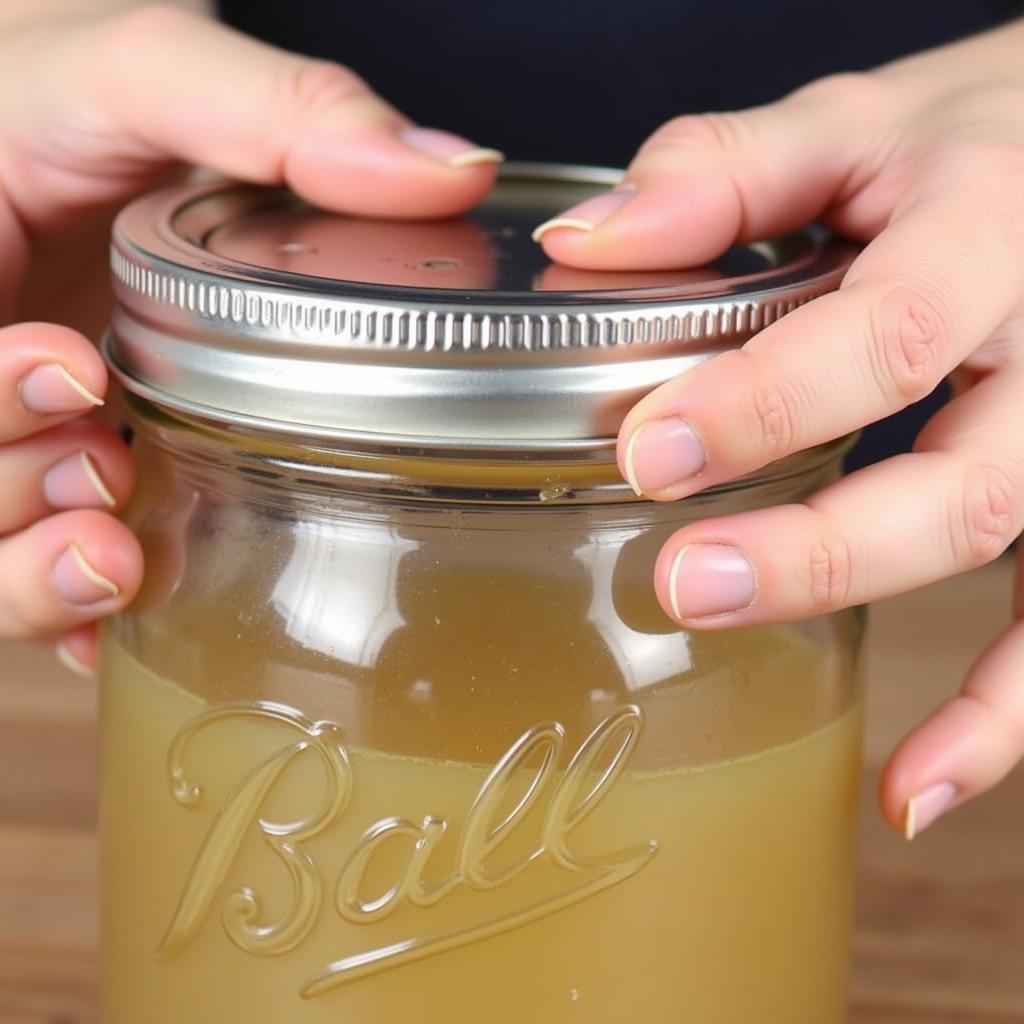 Placing Canning Lid on Jar
-
Place the Lid and Ring: Place a flat canning lid on top of each jar, ensuring the sealing compound is in direct contact with the jar rim. Secure the lid by screwing on a metal canning ring. Tighten the ring firmly but avoid overtightening.
-
Position the Jar in the Can Seamer: Carefully place the filled and lidded jar into the can seamer’s base. Ensure the jar sits level within the seamer to guarantee an even seal.
-
Lower the Can Seamer Head: Gently lower the can seamer head onto the jar, ensuring it sits flush against the lid. The seamer’s rollers should be in contact with the lid’s flange.
-
Begin Rotating the Handle: Start rotating the seamer’s handle clockwise. You’ll feel some resistance initially, but it should become easier as the seaming process begins.
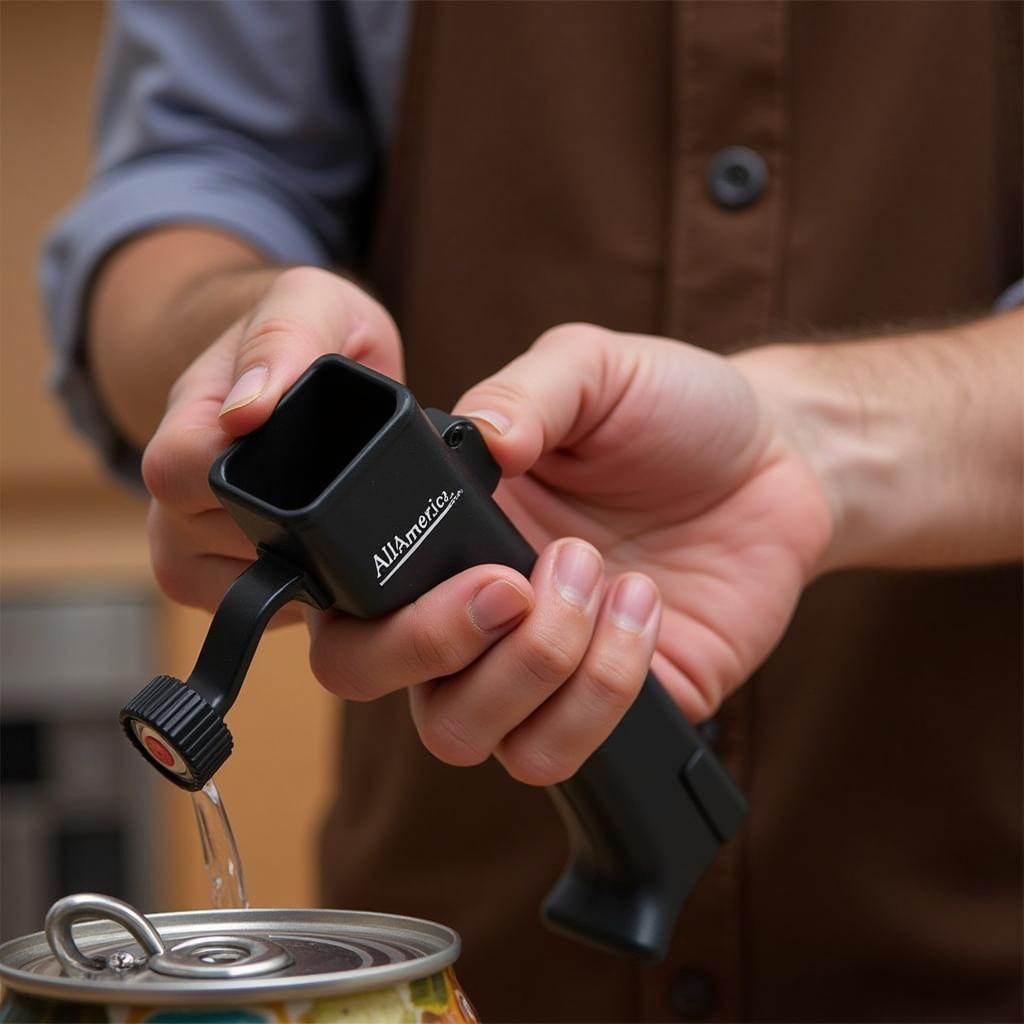 Rotating Can Seamer Handle
-
Complete the Seaming Process: Continue rotating the handle until you feel a noticeable increase in resistance. This indicates a successful seal has been made. Most All American can seamers require a specific number of rotations for a proper seal, so refer to the manufacturer’s instructions for guidance.
-
Release the Pressure and Remove the Jar: Once you’ve completed the required rotations, carefully release the pressure on the seamer head by turning the pressure adjustment knob. Lift the head and gently remove the sealed jar.
-
Cool and Check the Seal: Place the sealed jars upright on a towel and allow them to cool completely. As the jars cool, you should hear a popping sound indicating a successful vacuum seal. Once cooled, press on the center of each lid – if it doesn’t move or make a sound, the seal is secure.
Tips for Successful Canning
- Follow Recipe Instructions Carefully: Always adhere to tested canning recipes to ensure the correct processing times and procedures are followed for safe preservation.
- Regularly Inspect Your Seamer: Before each canning session, inspect your can seamer for any signs of wear and tear, especially the rollers and cutting blade.
- Keep Your Seamer Clean: After each use, thoroughly clean your can seamer according to the manufacturer’s instructions to prevent rust and ensure optimal performance.
Using an all American can seamer is an investment in preserving your homegrown produce and creating delicious homemade goods. By following these steps and utilizing your seamer correctly, you can enjoy the fruits of your labor all year round.